
You’re finally tired of editing websites in the bright, clear daylight of your (insert hosting company name) server. Which is a dangerous habit anyway, right? Or perhaps, you want to learn how to build in WordPress without spending money on hosting. Or you want to get all Frankenstein on a theme. The ‘why’ is yours. The ‘what’ is that you need to create a sandbox. On your computer. Wherest thou can frolic. Like a mad bunny.
NOTE: MAMP is a private webserver. Installing it doesn’t mean your stuff is online. It’s only visible inside your network.
Setting up your website locally so you can test and edit it saves you time, hassle and it’s a great firebreak against hacks.
Grab a snack. Let’s get into this.
First of all, you need to download and install MAMP or MAMP PRO. The instructions I have outlined below are for MAMP PRO. I selected MAMP PRO for its ability to save host and database data to Dropbox.
Never trust your data to just one computer.
MAMP (free) setup is a little different than what’s outlined below. For the FREE version, here’s a good video to watch: https://www.youtube.com/watch?v=10rsWKEDFvw&t=186s
But… Where is the FREE VERSION?
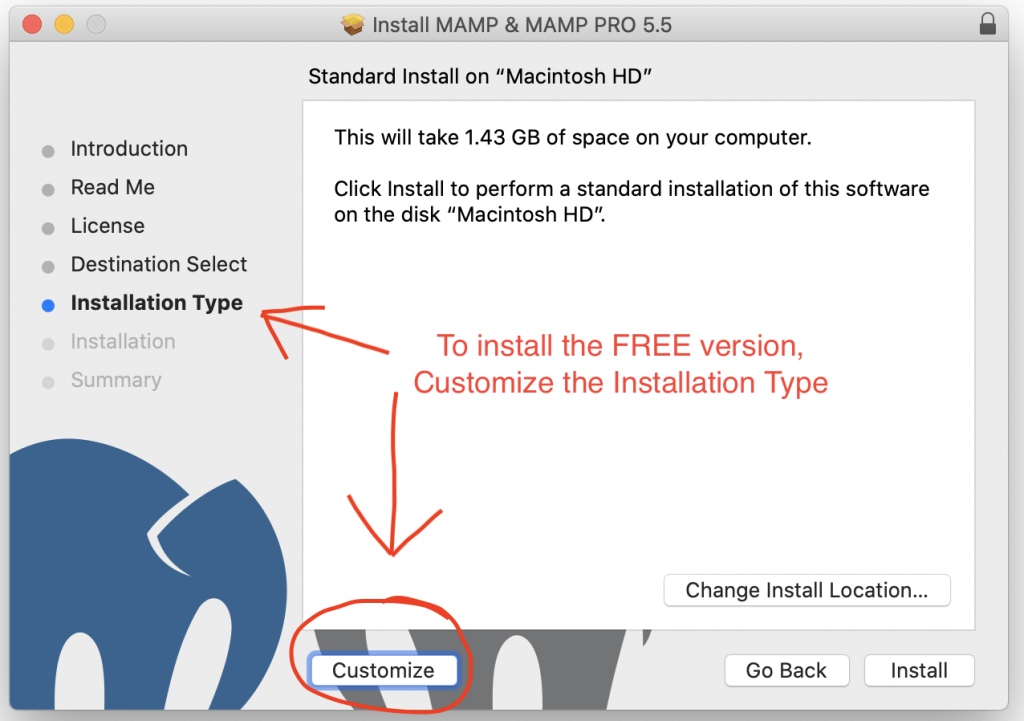
During installation, you might be wondering where is the free version? Both the FREE and PRO versions come down in the installer file. But, by default, the PRO version is installed. If you just want to run FREE, you’ll need to CUSTOMIZE the installation so as to select the Free version rather than the PRO version. See Fig. 1.
Once you have MAMP PRO installed on your computer, the first thing you’ll need to do is install hosts. In the FREE version ‘hosts’ are folders in the MAMP/htdocs folder. In Pro, they are on a dashboard. Another reason I sprung for the PRO version.
1. Install hosts.
Select the General tab at the top. Click the + at the bottom. This will open the Creating a new host dialogue. See fig. 2.
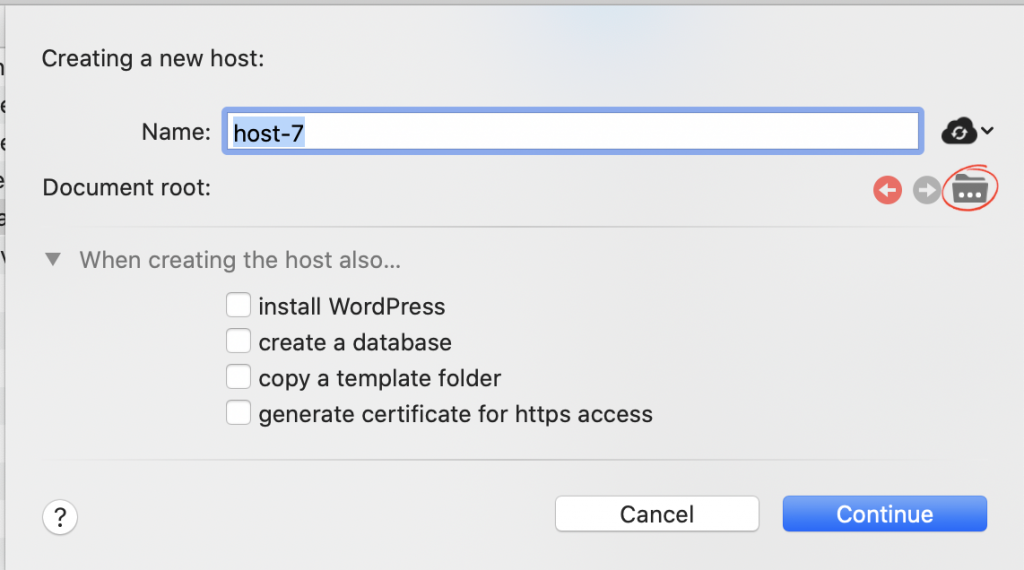
Inside this dialogue, add the name of the host. Then click the folder that’s marked with a red circle. This allows you to select a Document Root folder for the new host. After you’ve selected the ROOT folder, return to the main dialogue.
Regarding the 4 checkboxes. If you are installing your WordPress site from a backup, say from BackupBuddy by Ithemes, the one I use, then you don’t want to install WordPress at this point. But you do need to create a database. If you are not restoring from backup, then select install WordPress. Fear not. The checkboxes are smart. Irrelevant options are grayed out once you’ve made a selection.
The next step is to Create a Database. Add the Database name. If you want to create a new user, just type that username in. If you “grant access to user” and select from the dropdown, or type in a user that already exists, you won’t be able to modify the password field. Just type in a new user. Then add the password. (If you don’t have or create a new password here, you won’t be able to import your existing site to the new SQL.) (Updated Aug 5, 2021)

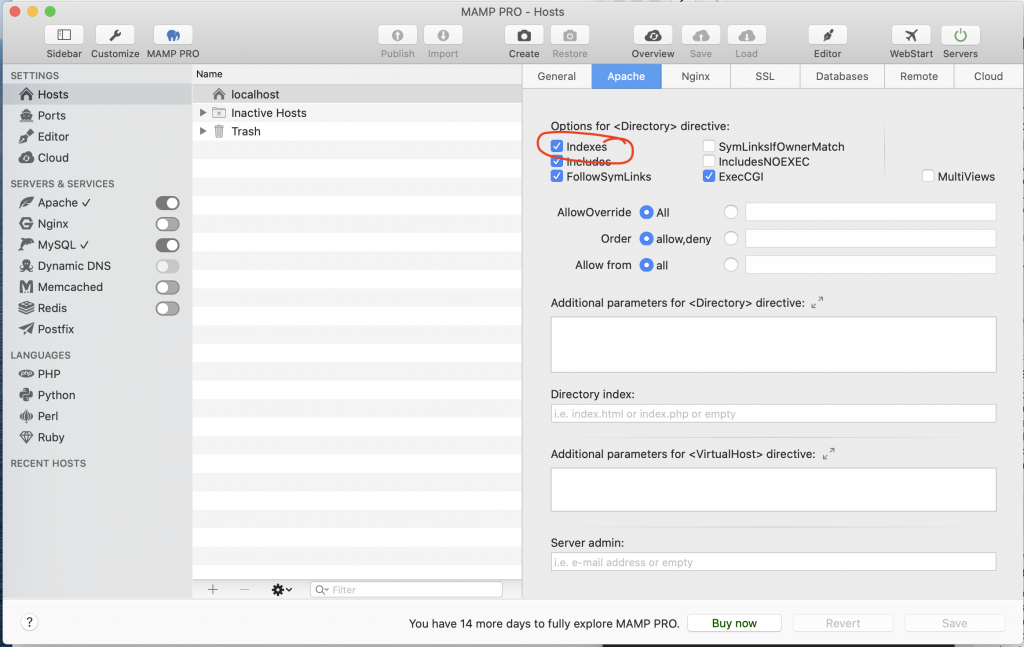
VERY IMPORTANT: Once the installation has run, you need to select the Apache tab at the top. Then make sure Indexes is checked. Otherwise, you’ll get an error when viewing your host. (See Fig. 3)
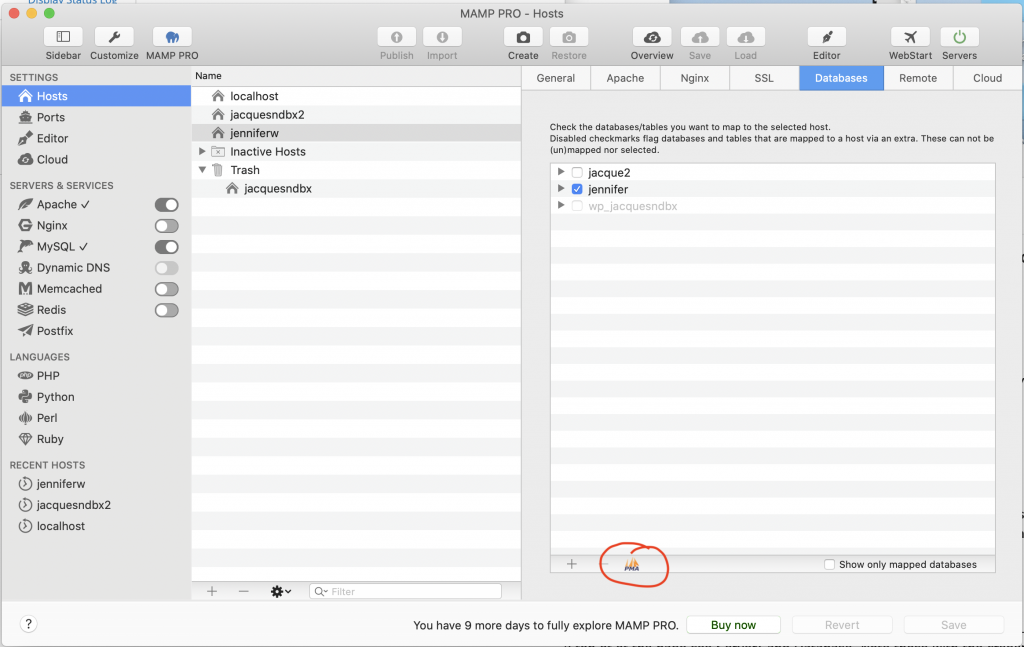
2. If you’ve just installed the database without WordPress, you may need to access its params. MAMP has myPHPAdmin built in.
Click the tab for Databases. At the bottom of the screen, find and Click the myPHPAdmin logo at the bottom. (see Fig. 4)
Once inside phpMyAdmin click Databases. Select the database you want to view. At the tippy, top of the screen, note the Server name (e.g., localhost:8889), Database name (e.g., mydatabase). You would have been prompted for Username and Password during the database installation. You need this Database information if you’re restoring from a backup.
In an upcoming article we will examine the new MAMP for testing on mobile platforms.